

myServer 6 supports Z-Wave devices
Z-Wave has become the defacto standard for homeowners and small businesses who are looking to automate their residences. There are thousands of Z-Wave devices from dozens of manufacturers covering everything from lighting to climate, to security and video monitoring. Allonis’ myZWave controller adds a robust, scalable and inexpensive way to control your Z-Wave devices.
As the smart home's popularity explodes, more and more connected devices are being added to people's houses. A lot of these devices – sensors, lightbulbs, heating controls, locks, plugs and the like – pack in Z-Wave to talk to each other.
In fact, there are more than 100 million Z-Wave devices in smart homes worldwide, with over 4,000 Z-Wave enabled devices to choose from.
A much lower power alternative compared to Wi-Fi, but with a much bigger range than Bluetooth, Z-Wave operates using low-energy radio waves to communicate from device to device.
Here is one 3rd party testing of Allonis's Z-Wave support: https://qubino.com//manuals/Compatibility_with_modules/Allonis_GW_Compatibility_manual.pdf
Requirements:
- myServer 6
- myServer 6 Z-Wave driver and license(s) for your Z-Wave devices
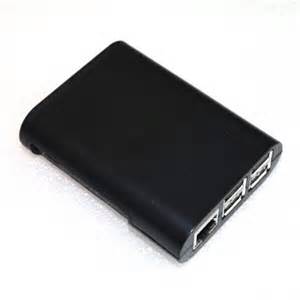
- myZWave Controller (Pi, Raz GPIO Z-Wave board, microSD card or USB3 with pre-installed software, case) OR Pi, Z-Wave USB radio, case
- Z-Wave device(s)
Main features
- Typically myServer communicates to the Z-Wave hardware support software via websockets.
- Optional: Full-Featured Z-Wave to MQTT Gateway: Expose Z-Wave devices to an MQTT broker in a fully configurable manner
- Secured: Supports HTTPS and user authentication
- Control Panel UI: Directly control your nodes and their values from the UI, including:
- Nodes management: Add, remove, and configure all nodes in your Z-Wave network
- Firmware updates: Update device firmware using manufacturer-supplied firmware files
- Groups associations: Add, edit, and remove direct node associations
- Z-Wave JS Exposed: Provides full-access to Z-Wave JS's APIs
- Scene Management: Create scenes and trigger them by using MQTT apis (with timeout support)
- Debug Logs in the UI: See debug logs directly from the UI
- Access Store Files in the UI: Access the files are stored in the persistent
storefolder directly from the UI - Network Graph: Provides a beautiful map showing how nodes are communicating with the controller
- Supports myServer 6 Discovery via MQTT: In lieu of the official integation, can be used to expose Z-Wave devices to myServer 6 via MQTT discovery.
Installation for Z-Wave USB radio:
- Shutdown myServer 6 controller (or the Pi you will be running Z-Wave on as a controller)
- Plug the Z-Wave USB radio into the Pi USB 2.0 port of the myServer controller.
- If you are using a myServer 6 Shelf system, you also have to enable the Front USB ports
- Go to /boot/firmware/config.txt and modify the all section with the bolded two lines, Save the File and Reboot.
- [all]
over_voltage_delta=50000
#pi5 overclocking
#arm_freq=3000
#gpu_freq=1000
dtoverlay=disable-wifi
dtoverlay=disable-bt
hdmi_enable_4kp60=1
enable_uart=0
# this is to enable the external usb ports on the shelf case
dtoverlay=dwc2,dr_mode=host
- [all]
- Go to /boot/firmware/config.txt and modify the all section with the bolded two lines, Save the File and Reboot.
- If you are using a myServer 6 Shelf system, you also have to enable the Front USB ports
- Ensure you have a fan solution to keep the CPU cool.
Installation for Z-Wave GPIO hat:
- Shutdown myServer 6 controller (or the Pi you will be running Z-Wave on as a controller)
- Plug the Z-Wave GPIO hat carefully on the 40 pins being careful not to bend any. Or plug in the USB Z-Wave radio into the USB 2.0 port of the myServer controller.
- Ensure you have a fan solution to keep the CPU cool.
Configuring ZWave-JS-UI software on a Pi
Setup the Pi4 operating system (sets up so that linux command shell is not bound to the serial port and can communicate with the Z-Wave Hat - note this may negatively affect bluetooth):
From the Raspberry Pi Command line:
Type: Sudo Raspi-Config
Navigate to: Interface Options
Navigate to: I5 Serial Port
Choose Login shell: No
Choose Serial port hardware enabled: Yes
OK, Finish, Reboot
FYI, these settings are stored in the Pi firmware...
Install the Z-Wave JSUI software:
From the Raspberry File Manager, navigate to:
32 bit OS: cd /usr/local/Allonis/zwave/
64 bit OS (newer myServer images): cd /home/allonis/applications/zwave/
Right click, Open in Text editor this file:
sudo nano docker-compose.yml
Adjust the Time Zone value, default is TZ=America/Detroit. Copy / paste the exact value of your location from the Wikipedia link in the document.
Go to the /dev folder using File Manager and verify that you see the ttyAMA0 file (GPIO serial device). If yes, go back to the docker-compose.yml file to edit it's properties.
By default, the system is setup to support a USB Z-Wave radio. So comment out the ttyUSB0 line and remove the # on the ttyAMA0 line if you are using a GPIO radio. Comment out the ttyUSB0 by adding the # in front if you are using the GPIO serial device.
Edit the address of the Z-Wave hardware hat / USB: uncomment the appropriate line (delete the #). Only one Z-Wave device can be supported at one time.
You could add another myServer hardware / software to support a second Z-Wave controller for very large systems.
Type Alt O and save the file, then Alt X to exit.
If using a USB stick radio
Plug the stick into a USB2 available slot and then boot the myServer Pi.
Once booted, in File Manager navigate to:
/dev/serial folder should now exist. Traverse to the "by-id" file. Right click on file and choose "rename". Copy the full name.
Paste the name into the docker-compose.yml file. Replace the example name with your actual name. Remove the comment # and Save the file.
An Aeotec Gen5 USB stick reports as ttyACM0 when plugged into a Shelf myServer 6 enabled front side USB port (as example).

This is yaml so indentation rules must be followed (keep same indentation as rest of uncommented lines)
The physical device gets mapped to the logical device /dev/zwave
It uses the full path to the device in the using the by-id reference path that doesn't change inbetween reboots.
Configure Z-Wave JSUI software
Open a terminal window:
32 bit: cd /usr/local/Allonis/zwave
64 bit: cd /home/allonis/applications/zwave/
Start the Docker Container: sudo docker-compose up
Launch this "interactively" to detect any errors during setup.
System will now download and create the Docker Container ZWave-JS-UI from the Internet.
Ensure there are no errors.
Once all is verified working fine (no errors noted), then run this command instead
sudo docker-compose up -d
This command instructs Docker to run the Z-Wave JSUI software in the background for production usage.
Go to a the browser on the Pi and type 192.168.1.123:8091. This assumes the Pi is on that IP address...use your IP address instead.
You don't need to accept the permissions to send Telemetry data back to the J2UI developers.
Click on top left hamburger menu. Go to Settings (the spoke).
Click on Z-Wave
Choose /dev/ttyAMA0 in the Serial Port dropdown (if GPIO Hat device is being used). If you are using a USB Z-Wave dongle than the serial port will be what you defined in the docker-compose.yml (example shown above: /dev/zwave). So you shouldn't change this dropdown in the web GUI.
Click the refresh button on all four of the S2 and S0 fields to get authentication tokens. These tokens are used when communicating between the Z-Wave controller and your secure Z-Wave devices.
RF region is typically set for USA (your Z-Wave radio must compatible for same market).
Ensure that the WS Server is enabled under the "Home Assistant" tab and ensure that the server port is 3000. This enables a JSUI service that informs myServer (and HomeAssistant) that a new device has been added to the Z-Wave network.
The Discover prefix should be set for homeassistant
At the bottom, Click Save. We should then be able to verify that the software is communicating to the Z-Wave controller hardware. Any errors will appear on the top right of the Settings webpage.
JSUI will restart and it will find the Z-Wave controller as "Device 1" It will also read any configuration that exists on the Z-Wave radio and display it. If an old ZWave device is not available on the network currently, it may show as "Unknown".
Click Control Panel on top left nav. You should then see your Z-Wave hardware identified. You should also see the "Scan completed" on the very top right if succesful. If this shows an error message instead, diagnosis and resetup should be done to address the issue.
Click on Controller Statistics (next to Actions) and then see if there are TX and RX messages as further evidence that the software is talking to the Z-Wave radio hardware.
At this point, if no errors, now would be a good time to set Docker to launch this as a Service at boot.
To shutdown JSUI, go to the terminal window and issue Ctrl-C to stop the JSUI service.
Go back to a terminal window and ensure you are in the OS appropriate folders:
32 bit OS: /usr/local/Allonis/zwave/
64 bit OS (newer myServer images): /home/allonis/applications/zwave/
and go type:
sudo docker-compose up -d
JSUI should show as "Started"
The next time the Pi boots, Docker runs. Docker then runs this command at boot as well running ZWave JSON as a service.
Note: multiple automation servers can connect to the single ZWave JSON software (like HomeAssistant AND myServer 6)
Manage your Z-Wave network
Go back to the 192.168.1.123:8091 webpage and click Actions on bottom right hamburger menu icon and do "Managed Nodes" and then click Inclusion / Next.
If your Z-Wave devices were previously on a different Z-Wave network, you must Exclude the Devices before Including them. Click Exclude, put your device into Exclude Mode, and the Z-Wave controller should exclude it.
Once all are Excluded (or new devices), Include them. Ensure you have each device named and in a Location.
Configuring myServer 6:
- Shutdown myServer 6
Select and Install the ZWave JSUI driver from Software Updater onto myServer 6
- Start myServer 6
- In the Device Drivers page, double click on the ZWave MQTT Configuration button in the driver
- Add a new Controller: ZWaveJSUI|AddController~ZWave~192.168.1.123:3000~Equipment Note that this example assumes the Z-Wave hub is installed on the myServer 6 controller GPIO - therefore we used 192.168.1.123 for it's IP address. If you use localhost (127.0.0.1) then you won't be able to manage JSUI from Dashboard running on a non myServer 6 controller browser.
- myServer will automatically do a Discovery to the Z-Wave hub and auto create devices that Z-Wave has Included
- Click the Discover button. This should find the Razberry(s) on the network that were previously Included. If devices don't import check that ALL devices have a name / location assigned to them.
- Type the Z-Wave controller's IP address if Discover didn't find it (it may be offline)
- The default port is 3000. This must match what was setup in the ZWave-JSON setup page.
- The default poll rate is 1.5 seconds.
Upgrading JSUI
Periodically, JSUI software will be updated.
From a Terminal Window on the Pi where the Z-Wave radio is installed:
64 bit: cd applications/zwave
or:
32 bit: cd /usr/local/Allonis/zwave
sudo docker stop zwave-js-ui
sudo docker rm zwave-js-ui
sudo docker pull zwavejs/zwave-js-ui:latest
sudo docker compose up -d
JSUI should now be up to date.
Example of docker-compose files
64bit default:
version: '3.7'
services:
zwavejs2mqtt:
container_name: zwave-js-ui
image: zwavejs/zwave-js-ui:latest
restart: always
tty: true
stop_signal: SIGINT
environment:
- SESSION_SECRET=mysupersecretkey
- ZWAVEJS_EXTERNAL_CONFIG=/usr/src/app/store/.config-db
# Uncomment if you want logs time and dates to match your timezone instead of UTC
# Available at https://en.wikipedia.org/wiki/List_of_tz_database_time_zones
- TZ=America/Detroit
networks:
- zwave
devices:
# Do not use /dev/ttyUSBX serial devices, as those mappings can change over time.
# Instead, use the /dev/serial/by-id/X serial device for your Z-Wave stick.
# - '/dev/serial/by-id/insert_stick_reference_here:/dev/zwave'
# uncomment the following if using a z-way hat
# - '/dev/ttyAMA0:/dev/ttyAMA0'
# uncomment if using a zooz zwave stick !!!! NOTE YOUR ID WILL BE DIFFERENT !!!!
# - /dev/serial/by-id/usb-Silicon_Labs_CP2102N_USB_to_UART_Bridge_Controller_62b401b08ebcea11b15696e368aed703-if00-port0:/dev>
# a silicon labs zwave stick will look something like this
# - /dev/serial/by-id/usb-0658_0200_E2080102-4A02-010E-1B1B-FA1965D0E930-if00:/dev/zwave
# - '/dev/serial/by-id/usb-Silicon_Labs_CP2102N_USB_to_UART_Bridge_Controller_66ba5effd73eeb119bfc37bcf28b3f46-if00-port0:/de>
- '/dev/ttyUSB0:/dev/ttyUSB0'
volumes:
- zwave-config:/usr/src/app/store
ports:
- '8091:8091' # port for web interface
32bit configured for GPIO serial:
version: '3.7'
services:
zwavejs2mqtt:
container_name: zwave-js-ui
image: zwavejs/zwave-js-ui:latest
restart: always
tty: true
stop_signal: SIGINT
environment:
- SESSION_SECRET=mysupersecretkey
- ZWAVEJS_EXTERNAL_CONFIG=/usr/src/app/store/.config-db
# Uncomment if you want logs time and dates to match your timezone instead of UTC
# Available at https://en.wikipedia.org/wiki/List_of_tz_database_time_zones
- TZ=America/New_York
networks:
- zwave
devices:
# Do not use /dev/ttyUSBX serial devices, as those mappings can change over time.
# Instead, use the /dev/serial/by-id/X serial device for your Z-Wave stick.
# - '/dev/serial/by-id/insert_stick_reference_here:/dev/zwave'
# uncomment the following if using a z-way hat
- '/dev/ttyAMA0:/dev/ttyAMA0'
# uncomment if using a zooz zwave stick !!!! NOTE YOUR ID WILL BE DIFFERENT !!!!
# - /dev/serial/by-id/usb-Silicon_Labs_CP2102N_USB_to_UART_Bridge_Controller_62b401b08ebcea11b15696e368aed703-if00-port0:/dev>
# a silicon labs zwave stick will look something like this
# - /dev/serial/by-id/usb-0658_0200_E2080102-4A02-010E-1B1B-FA1965D0E930-if00:/dev/zwave
# - '/dev/serial/by-id/usb-Silicon_Labs_CP2102N_USB_to_UART_Bridge_Controller_66ba5effd73eeb119bfc37bcf28b3f46-if00-port0:/de>
#- '/dev/ttyUSB0:/dev/ttyUSB0'
volumes:
- zwave-config:/usr/src/app/store
ports:
- '8091:8091' # port for web interface
- '3000:3000' # port for Z-Wave JS websocket server
networks:
zwave:
volumes: